Relevant to: | Guests | Speakers | Event Managers & Assistants* | Account Owners |
❌ | ❌ | ✅ | ✅ | |
| *Does not apply for Event Assistant | ||||
You have now started your journey hosting immersive online events, how exciting! https://images.gr-assets.com/hostedimages/1562854583ra/27810759.gif
Just follow these instructions and you'll be well on your way to an awesome event on Remo ✨
1. Register for a Remo account or log in to your Remo account here
2. Click the 'Create Event' button in the upper left-hand corner
If this is your first event created, you'll be automatically directed to create your event, so you can skip this step
3. This is your Event Settings (where you can set up and customize your event). First up are Basic Settings - enter the following details for your event:
 |
|
*Please remember, your maximum event length is determined by your Remo plan. If you require more time at your event, please get in touch with our Sales Team!**The Expected Attendance number cannot be changed once the event starts, so please remember to add some buffer. Your maximum expected attendance is also determined by your Remo plan. If you require more attendees, please get in touch with our Sales Team!
The number of floors in your event is controlled by both your inputted expected attendance and the floor plan you've selected.4. Ticketing: With Remo's new ticket management solution, you can create free or paid tickets, manage your event entry, and much more. Refer to How to create and sell tickets on Remo
5. Next, click on the "Invitations" tab to invite guests and speakers to your event:
 |
|
6. That's it! You can click on "Save and Publish Event" to publish your event ✨
Alternatively, you can take your event a step further by customizing it even more! Click on the "Advanced" tab to access our additional event settings.
Don't worry, we'll take you through each section and what you need to know below!
Advanced Event Settings – everything you need to know:
(If you're interested in a specific section, use the headings below to jump to that section's information right away) |
Event Details A. Event Tagline: Enter a line that summarizes your event concisely (this will only appear if you use the Event Directory)
B. Event Page Description: Give your guests a taste of what they will be experiencing within your event. For some creative ideas, check out this article
C. Remo Discovery: Decide whether to showcase your event within Remo's Event Discovery section located on everyone's My Events dashboard (this option is not available for private events, as private events cannot be listed in the Event Discovery section)
D. Event Type: Let us know what type of event you're hosting (so we can recommend some best practices specific to your event!)
E. Event Outcome: Let us know your event's goal (so we can recommend some actions to take to help you achieve this!)
F. Contact Channels: You can now add a 'Contact Host' button with up to 3 customized contact channels (email, phone or other). This button will be added to your event landing page and within the pre-event mic/cam check page.
Lobby & Welcome
A. Enable Lobby: When enabled, the lobby allows you, as the host, to control which guests enter and when. For more information on how the lobby works, please check out this article here
B. Lobby Message: Enter a customized text message your guests see while waiting in the lobby
C. Enable Welcome Message: When enabled, the welcome message is a special pop up shown to guests when they first enter your event (it can be an onboarding tip, a special announcement, or simply a "Welcome to the event!" message). For more information, check out this article
D. Welcome Message: Enter the message shown to guests when they first enter your event here
E. Welcome Message Media: You can also include a picture or video with your welcome message by uploading/linking it here
Floor Content
Got some content to display at your event – like a video, a donation platform, an online game? Whatever the case, our Content Banners feature lets you display the content you want, in the way you want AND where you want it.
Just click "Add Content" to begin!
Check out this article for more information on how to create and use Content Banners

You can add floor content after saving and publishing your event firstFeature Toggles
You can easily enable or disable the following features depending on how you plan to run your event:
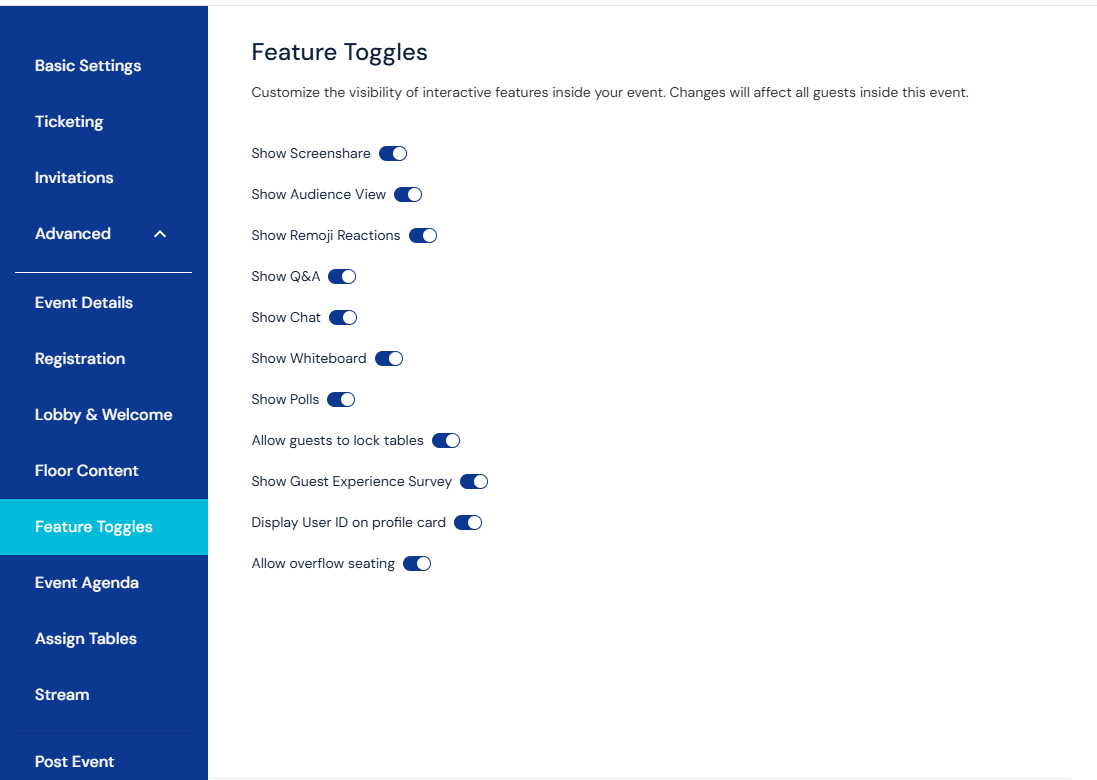
A. Screenshare: Select whether you want to share your screen so that other people can see what you see! (If you want to show an awesome webpage or you’ve prepared a brilliant cutting-edge presentation deck, sharing your screen is the easiest way to show that off - check out this article for more information.)
B. Audience View: Select whether you want to enable Audience View for your event (Audience View allows you to see the avatars of everyone in the audience while in Presentation Mode – check out this article for more information)
C. Remoji Reactions: Select whether you want to enable Reactions in Presentation Mode for your event (this gives your presenters a way to gauge real-time reactions – check out this article for more information)
D. Q&A: Select whether you want to enable Q&A module for your event (this is a dedicated tab where guests can submit their questions and upvote each others' questions – check out this article for more information)
E. Chat: Select whether to enable Chat for your event (this controls whether your guests have access to send messages through General, Table, and Private chat – check out this article for more information)
F. Whiteboard: Select whether to enable the Whiteboard for your event (check out this article for more information)
G: Polls: Polls are a fantastic yet easy way to interact and engage with your guests at an online event. Not only can they help you understand more about who your guests are, but it's also a ton of fun to answer.
H: Allow guests to lock tables: This new features allows guests to lock tables if required. Choose whether you want to provide this option to the guests.
I. Guest Experience Survey: Select whether to enable the Guest Experience Survey for your event (this is a one question survey for guests to give their feedback – check out this article for how it works!)
J. Display User ID on Profile Card: Select whether you wish to display user ID on profile card (displays the user ID when you click on the avatar)
K: Allow overflow seating: Select whether you wish to enable or disable table overflow option. You have the flexibility to enable or disable table overflow at any time during the event using the toggle within the event settings. (check out this article for more information)
Event Agenda
You can set up an event agenda so guests can see exactly what's going to happen during an event.
To get started, just click "Add New Item".
For more information on setting up your agenda, please check out this article!

You can add an event agenda after saving and publishing your event firstAssign Tables
Have some VIP guests? Or, a cleverly mapped-out seating chart for your event?
Using our Assign Tables feature allows you to pre-assign a table for a specific guest to enter when joining the event. Just select a floor and click "Manage" to begin assigning!
Learn more on how to use this feature here
You can assign guests to a table after saving and publishing your event firstPost Event
After your event has ended, you can find a treasure trove of information about your event in the post-event tab:

A. View Event Analytics: You can check our full suite of event analytics after your event – including % of users with mic/cam on, how long guests stayed in your event, and average connections made per guest (please check out this article for more information on our event analytics available)
B. Export Guest List: Export your full guest list complete with guests' name, email, login time, logout time and time spent in your event.
C: Export Poll Answers: This is an export of each individual quiz or poll's results, so you can see results at a user-level. It will include the name and email of each voter as well as the answer option each user selected.
D. Export Questions: Download a list of submitted questions from your guests in the Q&A panel
E. Download Presentation Recordings: If you've recorded your Presentation, you can find the recording here for download! (Learn more about it here)
And that's it! ✨
Feel free to explore Remo's Help Centre further for more information on what you can do with events on Remo. As always, if you have any questions, feel free to send us a message at support@remo.co